Wednesday, July 28, 2010

Sisterhood Challenge: Funnies

Hi everyone!

Thanks for stopping by The Sisterhood. Micki here and I decided to go with a really simple challenge, one I think you guys will like. So what's the challenge?
Create a card, page or 3D project that is Humorous & Funny. It can be a funny image, a belly chuckling funny sentiment...whatever makes you chuckle.

I don't know about you but I love Humorous - Funny cards. And since our sister, Boni, has just released some great images & sentiments that definitely tickle the funny bone, we (ahem, well I asked and then decided) to change the challenge and use Boni's digis :-).

Be sure to follow Boni's blog : Bonibleaux Designs...... I'm talking freebie...... :-)

I used Hillbilly Straw colored him with Copics. The sentiment is from Stampabilities called Too Cute To. One phrase kept popping into my head, so I went with it and typed it up in Word, printed it and adhered it to the inside. It's "ain't I purdy", lol. Ok so I'm not very creative when it comes to phrases.


Now check out what the rest of the sisters came up with:

Darlene created not just one but two awesome cards :-)


Come join us this week and show us your Funnies! Can't wait to see what you guys come up with.


Wednesday, July 21, 2010

Around the world next stop; "The Good Old USA"

Good morning everyone, and Welcome to the Sisterhood.
Linda here, today with your challenge.
Before we get on to the details of this weeks challenge,
We would like to thank everyone that participated
last week. What awesome creations..
We really do love seeing all your lovely creations..
Ok so this week the theme is Around The World.
And we are Stopping in The Good Old USA..
We would like to see your Red White and Blue.
Here is what our talented Design team has come up
with for your inspiration.

Kim
Linda

Diane

DarleneBoni
[you've got to check out her blog post to see where the red, white and blue fit in]


Micki


Ok now its your turn, So drag out those Reds, Whites, and Blues
And lets see your creations.

Tuesday, July 20, 2010

Wow! What a fabulous bunch of Man cards!

It was a tough call - I just adore what you've all done with the challenge - and who knew so many other challenges had the awesome 'manly' idea this week! =)

The Top Three Sisters this week...in no particular order....(and I hope they don't mind me posting their creations!)


and my top Sister choice for a $5 gift certificate...

Thanks so much for playing along everyone - I actually had help from MrP to choose since I was loving them all!
Hope to see you here tomorrow morning for another fabulous challenge =) 


Wednesday, July 14, 2010

Bonibleaux Designs Y'All!

Hello Sisters! Tanis here with your Sisterhood challenge today...and are you in for a treat! Have you been over to FireCracker Designs by Pamela lately!? There's a new designer in town...our very own Boni Boutelle-Jones! These Bonibleaux Designs can be found on the FCD website here...and we're just so lucky to be able to give you this little sneak peak at a new image...Hillbilly Straw! There's even fabulous sentiments to go along with each manly image (because we all know that man cards can be a challenge).

Since this is my challenge and in my mind that means I can do whatever I want, I'm going to offer up a $5 gift certificate to one lucky challenge participant to get some of these fun images designed by Boni. Your challenge, should you choose to accept it, is to create a man card. Whether that includes an image of a man, it's for a man or however you interpret 'a manly challenge'...just link your image and on Tuesday, I'll be back with some $ for my favorite!

Until then, check out what the Sisterhood of Crafters has come up with for your viewing pleasure....

Tanis


Micki


Git 'er done!

Tuesday, July 13, 2010

And the Winner is.....

I almost forgot to announce the winner of the stamps from last week's challenge. The winner is ....... Claire and she is our Top Sister also. Even though she was the only one to enter, her card was gorgeous enough to have earned her the top spot anyways. : ) So be sure to grab the badge on the sidebar and display it on your blog with pride. You deserve it.

Wednesday, July 7, 2010

Celebrate the Month .....

Hello everyone, Diane here this week. It is my turn to be hostess at The Sisterhood, this is my first time to host. This week as our theme is Celebrate the Month. For those of you who do not know, the flower for the month of July is the Delphinium, Larkspur or Water Lily.
The challenge this week is to create any type of project using one of these flowers.
We don't offer prizes here very often, mainly because this is a blog for fun and friendship, but I'm going to put up a prize package this time. I have been cleaning out my scrap room and could have a huge garage sale just with scrap stuff, so I'm going to put up some of my goodies as a prize.

Here is the prize for this week's challenge:
I chose the WaterLilly and used a digital stamp by Delicious Doodles. She also has a beautiful Delphinium. I love the Delphinium she made but I totally butchered it when coloring it. Some of our Sisters though used it and did a beautiful job on it.


Here is what my sisters came up with for this challenge.


It is time to celebrate in Sisterhood style. You will have until Tuesday, July 13th at 5:00 pm to finish this challenge. Just leave a comment below along with a link to your project. I will pick a winner of the prize by random draw from all the entries.

Tuesday, July 6, 2010

Winner and Top Three

Hiya folks!
WOW - some fabulous entries again last week - well done to all those who entered!
This week's Top Sister then, goes to:
JANE at The Paper Affair
Well done sistah! Pick up your Top Sister Badge from the sidebar, and display it with pride hun!!
And the Top Three:
1: Chey on her Aunt'e blog, Nicki's Knacks and Papercrafts
2: Amy at Crafty Amy
3: Irit Shalom at Irit Shalom's Designs
Well done sistah's!! Pick up your Top Three badge and display it with pride too ladies!!
Tune in tomorrow for another exciting challenge from my sistah's!
Hugs,
Teri xx

Wednesday, June 30, 2010

Sisterhood Social: Book or Movie Inspiration

Hiya folks!

Teri here, my turn to host this week's challenge, yeay! As it is a five weeker this month, I am hosting a bit of a social type of challenge.

There have been some fabulous books and movies in the past. Sometimes the movies fail to live up to the books or even do them justice. Sometimes a movie is so captivating you just have to go see it more than once (some recent movies come to mind. . . LOL).

Personally, I have always been 'into' thrillers and murder mysteries. I started reading avidly when I was a teenager, lying in bed 'til way after midnight with my latest library book. Usually it was an Agatha Christie novel, but then I progressed into heavier reading, the likes of Dean Koontz, Richard Laymon and the King of thrillers and horror himself - Stephen King!

Of course this all lead to my liking of horror movies. I used to watch the re-runs of the old Hammer House of Horror movies, with Christopher Lee as Dracula, and Peter Cushing as Van Helsing, ah, those were the days! Trouble is, the Vampyre thing has stayed with me, and I still love a good Vamp movie! I really loved the Gary Oldman version of Dracula, and of course Tom Cruise's Lestat in 'Interview With a Vampire'. Must admit though, I cannot see what all the fuss is about with the Twighlight movies.

My eldest D brought the DVD of New Moon home the other day, and I sat watching it for the first time (didn't see Twilight either!) thinking to myself - OK, so why is everyone so caught up in this? Bit too much of a teenage anxst type of thing for me. I prefer a more mature Vamp myself, he is way to skinny for my taste! LOL. Now if it were Hugh Jackman. . .mmmmmmm!!


So, with all that said, my challenge to you is:


Create something that is inspired by your favourite books or movies, and tell me a bit about why.


And here as a bit of inspiration for you are some fabby samples from my lovely sistahs:


Twilight Love


WOW ladies, what a brilliant job!


I do hope you can all join me and share your favourite books and movies. Can't wait to see what you create for this challenge!! Don't forget, as ever pop your link in with Mr Linky so we can come visit!


Tuesday, June 29, 2010

And the Winner is.........

Our winner this week of the CSN $60 gift certificate is:

KIM

Congratulations Kim!!

Wednesday, June 23, 2010

Quality Photography

Hi Sisters!! Boni here with your weekly post.  I have HUGE news 
CSN Stores has amazing online stores where you can find anything from lighting to furniture to cookware. I love their amazing collection of online stores - wonderful for people who love shopping as much as I do! The great news is that the lovely folks at CSN are partnering with me in a giveaway - this time for our U.S., Canadian, UK, and Germany readers. Be sure to read through the entire post (it is somewhat lengthy but well worth the read) then leave me the necessary information in a comment below and be entered to win either $60 U.S./Canadian / 60 Euro UK / 60 Euro German funds from CSN sister sites. I will give you all the information you need if you are picked. Your gift certificate is good for use on any one of CSN's fantastic corresponding websites. 

Now for the topic of the week - Taking the Best Photos of your Projects 
DIY offers this perfect solution to an inexpensive light box.

Materials Needed:

1.) A Box – It could be any size you want as long as you can light it! I prefer it to be as square as can be. You can find boxes anywhere for free. I got mine from work in which they throw out anyway. You can also find boxes in the back of strip malls, grocery stores, appliance stores or basically any place that makes or sells products. Thicker the better! (Free)

2.) Fabric ‘ This again could be any type. In my box I used white muslin fabric that is found at your local arts and craft store. Buy enough to cover the entire box. (4.00$ US or 1.99$ a yard) People suggested other fabrics like White Nylon and white fleece. If your extremely cheap and have some white under shirts laying around. Cut up the sides to where you have two halves of the shirt. If you use multiple shirts, be sure that the color matches or your end result may not turn out as you like it
3.) Tape ‘ I use tape to secure the fabric to the sides of the box. Reason being is that In-case you want to try out different fabrics. I use regular masking tape. (1.00$ US A Roll)
4.) Glue ‘ You can use a “Glue Stick” (1.00$ US a Stick) or spray adhesive (5.00$ US per Can) to stick the lining in the box.

5.) White Bristol board ‘ This will line the inside of the box and will also serve as your back round (.50 a sheet X2). I would suggest to buy 2 or 3 sheets as you will be cutting up two to line your box (Could be more depending on the size of your box) and one for the back round. Bristol board is a heavyweight paper (.006″ Thick) that is used in drawing/art. The name came from where it was originated, Bristol England. If you wanted a different back round you can also pick up different colors.
6.) Lights ‘ You will need to light this box and this could be the most expensive part of the box unless you already have the lights. In my opinion lighting is the most important part of this box. Without it you will not get the picture you desire. I went to my local hardware store and picked up some “Daylight” Bulbs. Using regular light bulbs will cast a yellow light and should be avoided. I purchased “n:vision” 90 watt equivalent compact florescent bulbs ($7.00 US). Basically any “Full Spectrum” light bulbs will do.
Also suggest a lighting fixture. If you have a one of those desk work lamps, It will work fine. If you don’t I suggest getting a “Clamp On Work Light”. At my local home depot they only had two kinds, A smaller reflector dish (5″) for 5.99$ (US) or the 10.5″ reflector for 11.99$ (US).
7.) Miscellaneous Tools ‘ Tape ruler, Ruler or any straight edge, scissors and knife
 
Now that you have the Materials I will show you out to make a light tent step by step. When your done you can take nice clean and crisp product shots.

Step By Step Process:

A) Take your box with a tape ruler and marker and measure in 2″ from the side of the box marking multiple points with your marker. When your done you will see your border, connect the points using your straight edge to where you should have a nice looking square/rectangle in the middle of the box with a 2″ border around it. Leave the top and bottom of the box alone as you will not need to mark it
B) Cut out the boxes you’ve drawn. Repeat that to the sides of the box where you have drawn the boxes. When you’re done, cut off the top of the box or remove the flaps on the top of the box. LEAVE THE BOTTOM INTACT!
C) Now take your Bristol board and make lines with your marker for every two inches 16 times. Then proceed to cut out 16 strips with your scissors.
D) Glue the paper strips into the box. Make sure the side with marker goes against the cardboard so it can not be seen. 
E) Take another piece of Bristol board and cut is so the width is the same as the inside of the box and the length is much longer then the box.
F) Place the long piece of Bristol board into the box to where the piece curves to the bottom. Avoid creasing as it will show up in your photo. Cut off excess paper that is sticking out the top.


G) Cut your fabric to where it will cover the holes. Then cut a big piece to where it will cover the top of the box.
H) Tape the fabric to cover the holes in the box except the one that is facing your background. Then tape the top piece on.
YOU’RE DONE!
Now all you got to do is light the top of the box and start snapping away! 


 There are many variations you can do to get the photo you want. If you’re having a shadow problem I suggest lighting the other sides of the box. If you’re getting vignetting I suggest a lens hood or moving the lens more into the box. Photoshop could be a handy tool also! Since my lens and camera are not the cleanest I tend photoshop the dust that is sitting on or in my camera. I also adjust the levels so it’s brighter.
Camera sticking into the box

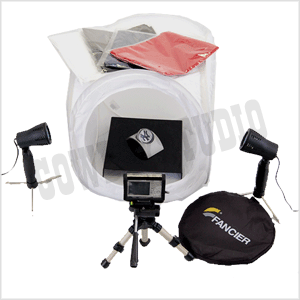
I personally have a photo tent after having utilitized the above referenced home-made tent. Santa Claus brought me a tent of my very own last Christmas and I have to say I love it. That's where CSN Stores comes in. CSN Stores has offered a $60 gift certificate for you to use in any of their online stores and you could use it to purchase your very own light tent from CowboyStudio (they are a CSN vendor) OR anything else that you may desire. 


[CSN Stores] $60 U.S./Canadian/UK
Here's the challenge, it's an easy one this week:


Leave your best photography tip in a comment below and a random winner will be drawn on June 29th and posted on June 30, 2010.